NFSAddons Forums

Main Menu
Menu

Show posts

This section allows you to view all posts made by this member. Note that you can only see posts made in areas you currently have access to.

Show posts Menu

Messages - rata_536

#1
Help/F.A.Q / Re: Siren reflection detail
Mar 14, 2025, 5:40 PM
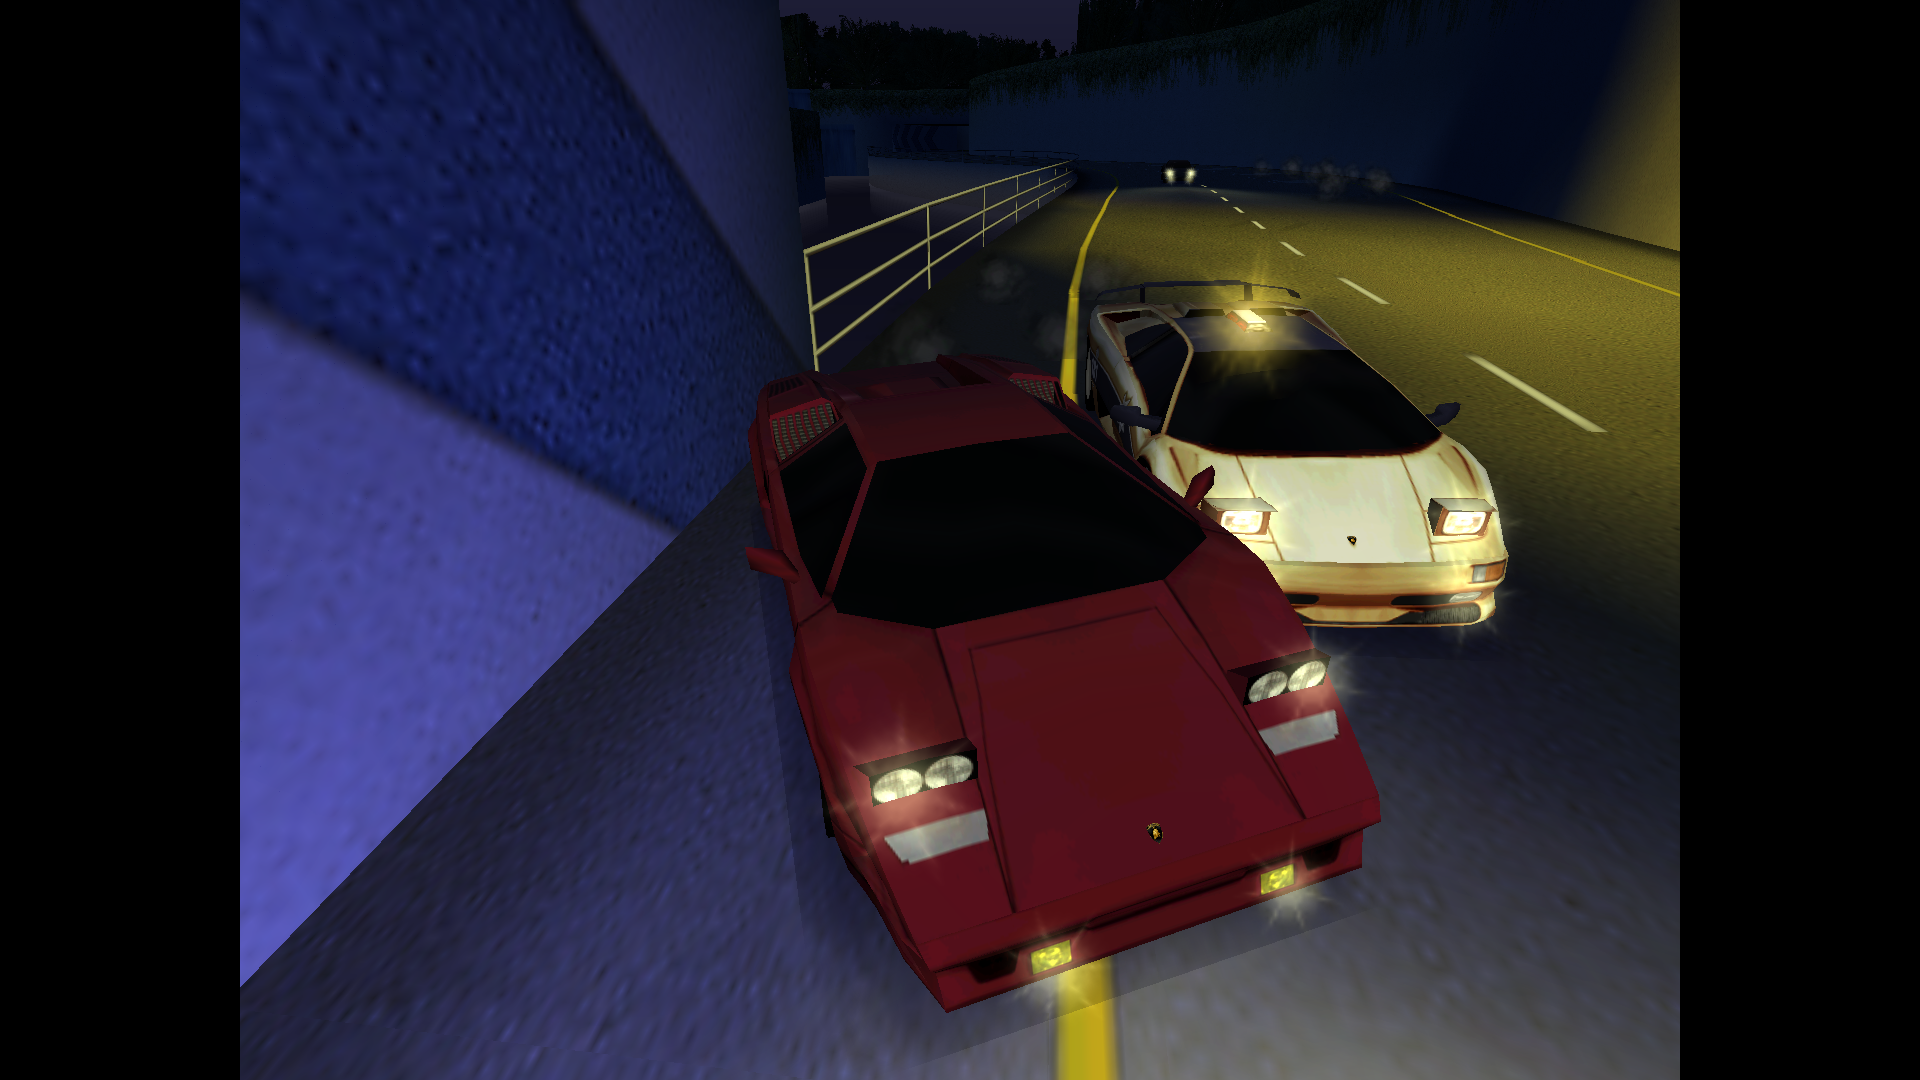
Note that my NFS4 patch does NOT alter the siren's reflection on the road, at all. Because I am busy with my main project which is the NFS3 patch, I did not assigned more time into it. But I located the source of these reflections, and left them marked in the cheat table for someone else to iterate on the patch and make it affect the reflections.

In short, in NFS4 the siren's reflections on road are picked by serial number, picking blue/blue for the Diablo and Porsche 911, and red/blue for everything else. For anyone willing to improve into this patch, the procedure would be to ditch this selecting routine entirely, and instead making it select its colours based on the dummy's name.

But also, you are comparing two different games and mods altogether, made with different criterias in mind. AJ went for keeping the sirens faith to the texture, despite the game's limitations about the reflections. I, instead, adapted the model to the game's limitation to the dummies themselves. So I did not actually fix anything (well, on that timeframe), I simply made it look more coherent.

To provide you an answer to your question: yes, there is a way for you to visually disable the siren light's reflections on the road. It's a dirty patch, but if you simply want to disable the thing, it will do: open the game's exe in any hex editor, and go to location 0x10799E, 0x1079A5 and 0x1079F7. You will then see some bytes that look like 'FF 80 80 FF' and '80 80 FF FF', these correspond to blue and red reflections, respectively. Change them to '00 00 00 00' to make these invisible until the NFS4's lights patch is improved.
#2
So in this post I will explain a lil deeper the whole siren colours thing. Not because I'm an attention whore, but because I think we could bring good things if we start discussing these stuff in the forums.

In the main loop, around hex pos 0xB8335 (we'll be decompiling the game in Cheat Engine, so this turns into 0x4B8F35), you will find the instructions:

0x4B8F0E cmp byte ptr [eax+00000A04],53 ; read the first letter of the dummy, see if it is S
0x4B8F15 jne 004B909E ; if it not and S, go away
0x4B8F1B test byte ptr [edi+00000200],20 ; check if car is police
0x4B8F22 je 004B909E ; if it is not, go away*
0x4B8F28 cmp dword ptr [edi+00000734],00 ; check if the siren is turned on
0x4B8F2F je 004B909E ; if it is turned off, go away
0x4B8F35 cmp byte ptr [eax+00000A06],4C ; lastly, check the third letter if it is L
0x4B8F3C jne 004B8FCB ; if it is not, follow the right side flash routine
0x4B8F42 fld dword ptr [00540020] ; as it was L, follow the left side flash routine
0x4B8F48 fcomp dword ptr [ebp+6E]

*TEST and CMP act differently in how you have to handle the jumps. If it was a CMP, then the next jump would have been JNE. TEST is used to check specific bits of a byte, used for bytes that store several bit flags inside, such as this byte that reads here, it handles behaviours for police, traffic, human or AI, disabling or enabling control (used for arrests). Fun side note, turn it to zero to play with VERY low gravity for some reason.

So for any standard siren, it will be SMRN or SMLN. So this part turns on the lightbar and it makes SMRN the red one on the right side, and SMLN on the left side. It turns out that anything that is not an L will be treated as right side (red). We're gonna write instead a routine that takes any uppercase letter. But we will need more space, so we will jump to another location. There is a large pool of unused bytes at 0x05BFD0. So we will replace the instruction at 0x0B8335 with a jump to this location. This jump takes less bytes  than that compare instruction, so we will fill the remaining bytes with NOPs, and because we won't be using it right now, we will also replace with NOPs the conditional jump:

0x4B8F0E cmp byte ptr [eax+00000A04],53 ; read the first letter of the dummy, see if it is S
0x4B8F15 jne 004B909E ; if it not and S, go away
0x4B8F1B test byte ptr [edi+00000200],20 ; dunno what this is, didn't look for it
0x4B8F22 je 004B909E ; but it is true, go away
0x4B8F28 cmp dword ptr [edi+00000734],00 ; check if the siren is turned on
0x4B8F2F je 004B909E ; if it is turned off, go away
0x4B8F35 jmp 0045CBD0 ; jump to the new place
0x4B8F3A... NOP ; No operation, fills the void created.
0x4B8F42 fld dword ptr [00540020] ; as it was L, follow the left side flash routine
0x4B8F48 fcomp dword ptr [ebp+6E]

To patch manually the .EXE, open with a hex editor and overwrite the bytes at 0x0B8335 as follows:

from
80 B8 06 0A 00 00 4C 0F 85 89 00 00 00to
E9 96 3C FA FF 90 90 90 90 90 90 90 90
Now we're gonna go to our new home, at 0x45CBD0. We have plenty of space to do stuff here. If we were to use compares to read each possible letter that we want to use, we would end up with a long line of nested compares, which albeit they will not tank the performance on a modern CPU, it is definetly very far from ideal. Also, would make adding new possible entries a painful process.

Instead, we will write a routine that read any letter from A to Z. We could add more entries, but we won't be needing more at all. We have to consider that if we want to cover all use cases, we need two letters for each colour, one for left flash and another for right flash. Alternatively, we could move the whole timing selector this using the fourth unused (only headlights use this field) dummy letter, the N, but we would lose compatibility with every existing car. You can always do it if you plan to expand even more the possibilities and capabilities, and put them together in a modpack.

So the new routine will come up as follows:

0x45CBD0 movzx ebx,byte[eax+00000A06] ; clear EBX and move the third letter there
0x45CBD7 cmp bl,41 ; compare to A (ASCII uppercase A character)
0x45CBDA jl 0045CBE1 ; if it is lower, jump ahead to 0x45CBE1
0x45CBDC cmp bl,5B ; compare to Z (ASCII uppercase Z character)
0x45CBDF jl 0045CBE3 ; if it is lower, jump to 0x45CBE3
0x45CBE1 mov bl,5A ; if it was not between A and Z, we make it Z
0x45CBE3 sub bl,41 ; this turns letters into usable numbers (A->0, B->1, etc)
0x45CBE6 imul ebx,ebx,07 ; we multiply this index by 7, explanation later
0x45CBE9 add ebx,0045CBF1 ; next, we add a memory address that we'll use for a table
0x45CBEF jmp ebx ; we're ready to jump to this table

So this is a very compact routine that will take any letter between A and Z and will jump to a desired colour we want for each. To select a colour we only need one write instruction and one non-conditional short-jump. Writing to a register takes 5 bytes, this jump takes 2 bytes, adding up to a total of 7 bytes, this is why we took the index number and multiplied it by 7. So what does this table look like? Well...

0x45CBF1 mov ebx,FFFFA050
0x45CBF6 jmp 0045CC3C
0x45CBF8 mov ebx,FF7070FF
0x45CBFD jmp 0045CC27
0x45CBFF mov ebx,FF000000
0x45CC04 jmp 0045CC27
0x45CC06 mov ebx,FFFF6050
0x45CC0B jmp 0045CC3C
0x45CC0D mov ebx,FF80FF60
0x45CC12 jmp 0045CC3C
0x45CC14 mov ebx,FFFF8080
0x45CC19 jmp 0045CC3C
0x45CC1B mov ebx,FF80FF60
0x45CC20 jmp 0045CC27
0x45CC22 mov ebx,FFFFFFF0
0x45CC27 jmp 0045CCA5
0x45CC29 mov ebx,FFFFFFF0
0x45CC2E jmp 0045CC3C
0x45CC30 mov ebx,FFFF8080
0x45CC35 jmp 0045CCA5
0x45CC37 mov ebx,FF000000
0x45CC3C jmp 0045CCB0
0x45CC3E mov ebx,FF7070FF
0x45CC43 jmp 0045CCB0
0x45CC45 mov ebx,FFFF70E0
0x45CC4A jmp 0045CCA5
0x45CC4C mov ebx,FFFF70E0
0x45CC51 jmp 0045CCB0
0x45CC53 mov ebx,FFFFA050
0x45CC58 jmp 0045CCA5
0x45CC5A mov ebx,FFC050FF
0x45CC5F jmp 0045CCA5
0x45CC61 mov ebx,FF60C0FF
0x45CC66 jmp 0045CCB0
0x45CC68 mov ebx,FFFF6050
0x45CC6D jmp 0045CCA5
0x45CC6F mov ebx,FF8080FF
0x45CC74 jmp 0045CCB0
0x45CC76 mov ebx,FF60C0FF
0x45CC7B jmp 0045CCA5
0x45CC7D mov ebx,FFC050FF
0x45CC82 jmp 0045CCB0
0x45CC84 mov ebx,FF8080FF
0x45CC89 jmp 0045CCA5
0x45CC8B mov ebx,FFFFE040
0x45CC90 jmp 0045CCB0
0x45CC92 mov ebx,FFFFF0B0
0x45CC97 jmp 0045CCB0
0x45CC99 mov ebx,FFFFE040
0x45CC9E jmp 0045CCA5
0x45CCA0 mov ebx,FFFFF0B0
0x45CCA5 mov [edi+7A8],ebx
0x45CCAB jmp 004B8FCB
0x45CCB0 mov [edi+7A4],ebx
0x45CCB6 jmp 004B8F42


We place this table right at 0x45CBF1, which was the number we added to our register after multiplying our inder with 7. This way, when it reads an A == 41, 41 - 41 == 0, 0 * 7 == 0, 0 + 45CBF1 == 45CBF1. B == 42, 42 - 41 == 1, 1 * 7 == 7, 7 + 45CBF1 == 45CBF8; right where it loads the blue colour. Then the jumps, we're defining which side (thus flash time) are these sirens are going to be. As the list is too long to cover with a single short jump after certain point, we simply do a little crime and jump right to another jump. We need this because if we switch to a long jump instead, the instruction will be two bytes longer and that would render the table unusable. Also as an option, and because there are registers that are getting entirely replaced right after this, you could for example pre-load the addresses of both jumps into two registers, and that should allow you to jump the entire table with the short jump instruction. By the time I realised that, I had already set all in stone tho.
At the end of the table, you notice that the branch for Z doesn't need to jump, because it's the last entry of the table so it can proceed simply to print this colour directly into the entity's siren. X on the other hand needs to jump Z and its print instructions.

After that, we need to return to the game loop. Remember that jump that we NOP'ed at the beginning, that we would not need anymore? Well that was a lie, we need it now, so that are those jumps after the final print instruction, only this time it won't be  conditional because we already know where are we going, based on the dummy's name we had already selected. So for the right side colours we jump to right side routine, and we jump to left side routine for the left side colours.

To apply the patch manually, head over to 0x05BFD0 in your hex editor and overwrite (DO NOT INSERT) those 00's as follow:

0F B6 98 06 0A 00 00 80 FB 41 7C 05 80 FB 5B 7C 02 B3 5A 80 EB 41 6B DB 07 81 C3 F1 CB 45 00 FF E3 BB 50 A0 FF FF EB 44 BB FF 70 70 FF EB 28 BB 00 00 00 FF EB 21 BB 50 60 FF FF EB 2F BB 60 FF 80 FF EB 28 BB 80 80 FF FF EB 21 BB 60 FF 80 FF EB 05 BB F0 FF FF FF EB 7C BB F0 FF FF FF EB 0C BB 80 80 FF FF EB 6E BB 00 00 00 FF EB 72 BB FF 70 70 FF EB 6B BB E0 70 FF FF EB 59 BB E0 70 FF FF EB 5D BB 50 A0 FF FF EB 4B BB FF 50 C0 FF EB 44 BB FF C0 60 FF EB 48 BB 50 60 FF FF EB 36 BB FF 80 80 FF EB 3A BB FF C0 60 FF EB 28 BB FF 50 C0 FF EB 2C BB FF 80 80 FF EB 1A BB 40 E0 FF FF EB 1E BB B0 F0 FF FF EB 17 BB 40 E0 FF FF EB 05 BB B0 F0 FF FF 89 9F A8 07 00 00 E9 1B C3 05 00 89 9F A4 07 00 00 E9 87 C2 05 00
So that covers the colour selection and assignment, we're pretty much done! Why "pretty much" and not straight up done? Because we still need to take down the original colour printing routine. Otherwise, the game will keep overriding our pretty colours with the standard pale blue and red. So we head to 0x42D0A5:

0x42D0A5 mov [eax+000007A4],FF8080FF
0x42D0AF push ecx
0x42D0B0 mov [eax+000007A8],FFFF8080
0x42D0BA mov eax,ecx


and we can simply NOP both instructions and that would work fine, or we can NOP them, move the push to the beginning and jump those NOPs:

0x42D0A5 push ecx
0x42D0A6 jmp 0042D0BA
0x42D0A8... NOP
0x42D0BA mov eax,ecx


Again, if you want to apply the patch manually, head over the exe into 0x02C4A5 and replace as follows:

from
C7 80 A4 07 00 00 FF 80 80 FF 51 C7 80 A8 07 00 00 80 80 FF FF
to
51 EB 12 90 90 90 90 90 90 90 90 90 90 90 90 90 90 90 90 90 90

And that's it! You can now save the exe, and start doing all kinds of crazy stuff on your mod cars! Finally that PSX Diablo will have the yellow and blue siren, am I right? That's the whole reason I came up with this whole idea, to restore the PSX police's original sirens, god damn it! It was definetly worth going to sleep at 2, 3 or 4 AM.


Something I realised after analising the whole stuff, is that the devs probably had intended the sirens to support more flexibility on the sirens to match the PSX version, but it was probably nerfed due to time constrains. Why do I think this? Because even if the instruction that gives the final colours is fixed, it is printing the colours for each one of the cars individually. That [EAX+7A4] instruction is key. At the moment that instruction is run, EAX is the start of a huge block containing a lot of information regarding each car. These start at 5E1120 and are 9AC bytes long. These contain, among many other stuff that I have not deciphered yet, the state of lights (off, low, highs), sirens, horn, how much is the car steering, transparency cooldown time (for when you reset your car), many other flags for when you have no control of the vehicle, what sort of behaviour you should get, and many more.
At the time the dummy's name is read tho, EAX has another value that varies for each dummy of the car, but this data block number is stored in EDI register. Finding this register took me many hours of dedicated debug and making a datasheet just so I could identify something that was stable to use for calculations and stuff.
If the other dummies allow also this kind of flexibility, it should be possible also to make taillights have the possibility to work as tail or brake lights independently, in addition to the normal behaviour. More stuff could be made for the sirens, like using the other letters to manage flash intensity and frequency (I bugged in a few results that looked interesting).


As bonus content and because it has been also modified for these pics, this is a list of all the dummy colours I found, as well as addresses that alter the headlights's lighting effect on the road!
DESCRIPTION                                                ADDRESS IN CE   ADDRESS IN EXE
Base siren dummy colour                                    0x004B906A      0x000B846A
Left siren colour (blue) [WE OVERRIDED THIS]               0x0042D8AB      0x0002CCAB
Right siren colour (red) [WE OVERRIDED THIS]               0x0042D8B6      0x0002CCB6
Taillight dummy colour                                     0x004B8B4E      0x000B7F4E
Headlamp dummy colour                                      0x004B8C7F      0x000B807F
Headlamp dummy colour (IN GARAGE)                          0x004664F3      0x000658F3
Taillight dummy colour (IN GARAGE)                         0x004666B0      0x00065AB0
Base (for strobe) headlamp dummy shine                     0x004B8BE2      0x000B7FE2
Low headlamp dummy shine                                   0x004B8C0F      0x000B800F
High beam headlamp dummy shine                             0x004B8C00      0x000B8000
Taillight dummy shine                                      0x004B8B04      0x000B7F04
Brakelight dummy shine                                     0x004B8AFB      0x000B7EFB
Low headlamps lighting strenght on track (projected)       0x0042D26D      0x0002C66D
Low headlamps lighting strenght on objets (projected)      0x0042D277      0x0002C677
Low headlamps lighting colour (projected)                  0x0042D281      0x0002C681
Low headlamps lighting strenght on track (focals)          0x0042D290      0x0002C690
Low headlamps lighting strenght on objets (focals)         0x0042D29A      0x0002C69A
Low headlamps lighting colour (focals)                     0x0042D2A4      0x0002C6A4
High headlamps lighting strenght on track (projected)      0x0042D2E0      0x0002C6E0
High headlamps lighting strenght on objets (projected)     0x0042D2EA      0x0002C6EA
High headlamps lighting colour (projected)                 0x0042D2F4      0x0002C6F4
High headlamps lighting strenght on track (focals)         0x0042D303      0x0002C703
High headlamps lighting strenght on objets (focals)        0x0042D30D      0x0002C70D
High headlamps lighting colour (focals)                    0x0042D317      0x0002C717

EDIT: Is it just me or the CODE text is ridiculously small? It's unlegible.
#3
Yeah what you need to do is open the texture, and duplicate the red lightbar (if you can find space on the texture) and use any semi-capable image software to make it blue (paint.net is quick and easy). If you can't find space on the texture, halve its size so you will have space for both red and blue bars. Then you'll need to export the .FCE file and load it on FCEFinish or ZModeler, and from there move the UV from these polygons into their new correct places. Lastly, adjust the dummies names to light up in blue I cannot find the model otherwise I would have shown you a few pics.

In a brief, you gotta do texture and model edits. If you never did any modding, you'll need tools and learning a few steps. It's not a hard thing to do so don't be scared.
#4
Are you trying to edit the software renderer textures set, by chance (TRxx_8)? Note that these will have to keep their 8 bit format otherwise the game will crash. If it is just an 8 bit texture on the standard set of textures then just do as AJ says and you should be fine.
#5
Quote from: DrSpeed on Mar 23, 2024,  2:31 AM
Thanks, this works like a charm!
Out of curiosity, would it be possible to change the pointer for the Empire City cop car, without affecting the Hometown one?

Yes, but it's a lil bit more complex because of how they initially set it up. The game first checks for Redrock/Canyons, if true sets the Talon. If false, checks for Atlantia/Aquatica, if true sets the Falcon. If false it checks for Rocky/Summit, if true sets the Discovery. Then there's no more checks, so it simply sets the Crownvic as general use, that means Hometown/Woods, Empire City, and the buggy and inaccessible track 09.

So the way to make the distinction between Empire City and Hometown/Woods is to replace the SN assignment (that part is right after the interceptor) with a jump to an area with more space, and do the final check for track 8 which would be Empire City (or any past 08 for what matters, even), assign the Talon if true, and assign the Caprice if false. Also this will require a new serial number to fit the additional local cop, which by default it will be called CVIC (when I say Talon for Empire City I don't mean the Talon that is on vanilla Redrock, that would be SN 501 and we want another SN that we can use separatedly). I've done that in my test build already (well and much more actually), but the reason why I didn't make a tutorial for it is because the end result (code-wise) is way less elegant, so until I set it up with a nicer way to do it, I'll keep it on hold.
#6
General NFS / Re: Just a simple question
Mar 28, 2024, 8:46 AM
Quote from: Paul Spain on Mar 28, 2024,  5:18 AM
Quote from: AgentMulder on Mar 28, 2024,  1:34 AM
There is no real reason for this. Hometown and Coutry Woods are areas like Virginia or Hazzard County that would actually realistically be a police car like Rosco's cop car

In the PS1 game of Hot Pursuit they got chocolate color 1990 Chevy Caprices with a SignalStat-Yankee-Dietz gumball lightbars and Atlantica has the Aussie style copcars. There is a cheat code to give the cops different vehicles but I can't remember it. You can also change their voices with cheats: Boston talk, French,Italian,German,and Spanish I think are the options.

You're mixing both versions. On PSX version, police for Hometown and Country Woods does in fact have the brown Caprice (which shares a HUGE resemblance with Iowa police cars), but Atlantica and Aquatica have the Crown Victoria, thus making all sense to have the city's logo on them.
Then the remaining cars are shuffled around like AJ mentioned (Redrock's Land Rover was moved to Rocky Pass), the LM002 got axed, an Australian cop was put into the game, and for a silly mistake, the Diablo interceptor went unused. Empire City simply ends up loading the Crown Victoria as well because that car is the fallback; if you were to have more tracks somehow modded into the game, all of them would use this car.

My theory as why we ended up having the Falcon is, it was going to be exclusive to the Australian version of the game, and they ended up shipping it for the main game. After all, its mesh is simply the Falcon GT's low body, with the spoiler removed.
#7
So it's old news that the game has a little silly folder inside CARMODEL/TRAFFIC/PURSUIT/ path, that contains a copy of the Pursuit Diablo SV for AI to use.


Older news is that this car is never used, unlike the original PSX version. Damn PC devs, they took that away from us! But why would they want to do that? Well, maybe they didn't. The answer is very obvious when we look at the game's exe:


Okay I'm kidding, nothing could be easily seen there. That's why we're using Cheat Engine to see a disassembly of the code in real time:


This can be explained easily. Here we can see the IDs of the police interceptors, 504 for the Corvette and 505 for the Diablo SV. So if both are there, why does the Diablo never show up?
Well, the answer is there. What we see there is the game looking for MadLand cheat code, and if it is enabled, then use the Diablo. That's what the op TEST DL,20 does, and if it is false, then it continues normally using the previously selected Corvette, as the op JE nfs3.exe+73900 indicates. But the one silly mistake is that the RAM adress where it's looking for it is 0055EB2E, but the cheat codes are in another castle! -Err, I mean, address:


This is great news, so this means that fixing the issue is as simple as looking to the right place!


How can you apply this permanently then? It's very simple, you just need a hex editor and replace the bytes. If you don't have a hex editor, don't worry cos you most probably have one already! VIVWizard has hex editing capabilities, even though it doesn't have usability features. Simply import the exe into a blank .VIV and switch to Hex mode (there's a button on the toolbar). There, you have to go to the address offset 0x072CA0, which is where I'm showing these pics.
Whatever hex editing tool you use, just make sure you're only overwriting these bytes, rather than adding them. VIVWizard doesn't need this caution cos it cannot add. Save the file (export if you're editing it with VIVWizard).


And that's it! The Diablo SV for the AI police is successful! Enjoy!


Well, that's a bit of a bitter ending, huh? You didn't need cheats on PSX to have the Diablo chasing you, you just had to play on hard. Well don't worry, there's an extra step we can make to easen that. We just need to search for difficulty instead! This is easily done by changing -again- the RAM address where we're looking, the method we're using to check, and what we're looking for.


So now, if we set the opponent's difficulty to Hard, the Diablo will be used. If we play on Normal, we keep the Corvette. How to implement it in the exe then?


Again, save and now you can enjoy the harder pursuits!
#8
Well I tried it using it on NFS3, it works in windowed mode but I can't get it to run on fullscreen (resolution error, line 487). It seems like it gets rid of the misaligned dashboard bug so I really want to try it.
#9
Quote1. Which parameters prevent the aforementioned settings from working?
To make AI pick cars, you need to make sure their Serial Number is below 50, in first glance.
Second, there is an undocumented byte in FEDATA which prevents AI to use cars, regardless if the Available for AI flag is set. To edit this, you need to open VIVWizard and switch to the hex view, then find byte 0x0E and set it to 00.
The only EA cars that come with this flag enabled are the DLC cars, namely Lister Storm, Jaguar XKR, Spectre R42 and Ferrari 456M GT. If I recall correctly, Ford Falcon GT and HSV VT GTS don't have it, but check it just in case.
I called it DLC flag and my guess is that it would have been used to load up the placeholder during online races if someone did not have the car installed, but VEG stated that the placeholder vehicle is never ever called so it'll remain in a mystery.
And since we're talking about FEDATA, another undocumented byte is 0x12, which handles the driver position in dashboard view. 00 is for LHD cars, 01 for RHD cars, and anything else (for example 02) is for central drive cars (El Niño). Which brings up a very funny thing, EA did not set this flag properly for all DLC cars so you might want to check and correct them.

Another edit:
TO answer the other questions:
Quote2. To unlock my own "Bonus" cars, do I just complete Tournaments as usual?
Nope, setting Bonus flag will just make them remain blocked, as there's no code to unlock those IDs. You can even do CARS cheat and they will remain locked.
Quote3. Is it possible to make a car "Bonus", but so that it'll appear on Grid even if still locked?
Nein. Unless you're doing memory edits with ghost editing, cheat engine or jericho's randomiser, you have to unlock it first.

Quote from: Rider66 on Aug 25, 2023,  9:28 AM
Moreover, 456 and Spectre both appears on grid for me.

If you're using my cars that's expected cos I removed the DLC flag for them. I don't remember if I did it for all of them though.